Friday, June 27, 2008

Climbing Rope Rug

How to Make Your Old Climbing Rope Into Furniture:
Seven Hours of 'Art' on a Saturday


Well, I've made my fifth (?) rope rug out of an old climbing rope, this one out of a length of 100 feet of half-inch static line.

Making a rope rug somehow seems to be an envious skill, but I don't think it demands all that much talent, just patience (and not much of that either). Still, Roy walked in and commented that he hopes everyone I give them to knows what a supreme act of love the making of a rope rug for them is. Sure, I'll take that, but half a Saturday is also not much to give for a cool rug and a nice gift.

There are many ways to make a rope rug or rope mat, as well as a few good instructions out there on how to do it. The more complex square pattern of a rope 'mat' can be seen, complete with instructions, on Summitpost.com. There are of course other spinoffs, either professionally made or otherwise - some examples and discussion can be seen here (plus an old mosaic) and here, with a whole variety of designs.

The easiest way to make a rug would be the spiral rug, either taped on the bottom, or sewn into the spiral. These form cool mats as well, and can be seen on the discussion board posts above.

Other possible designs are outlined in knot books - as pointed out by Tradgirl - or by ornamental knot patterns found online or elsewhere, because in the end rope rugs are just big beautiful knots.

My knot of choice for making a rope rug is the Prolong Knot. Here are a few reasons:

  • It makes elongated mats that are good for putting in front of doors, desks, etc
  • It has a low 'weave-to-length' ration (i.e. I have to go over and under less per rug than other woven designs - what can I say, I'm lazy)
  • The design can be extended or shortened for differing rope lengths and widths
  • Detailed instructions are available online in PDF format
  • Other online instructions are readily available

But of course there are a few disadvantages:
  • The rug loops at the edges aren't glued or sewn so they can get mussed when moving the rug. This will happen for any woven rug, but less weaving = more room for looseness.
  • As with any weave (as opposed to a spiral) it's not so obvious what to do with the ends (in reality, you just weave them in so they end up underneath).
At any rate, here is a picture of my newly completed rug:


The black rope served me and others well as a rigging (anchor) rope for many years, but it is getting quite old (more than ten years, I forget the actual amount) and I never bring it with me anymore because it is so...darn...heavy! But since it is still in okay shape after all that abuse, I'm sure it will be a fine taker of foot traffic for years to come.

For comparison, you can view a rug I made a while ago, out of a 10.2mm 50m dynamic rope. You can note that it's much longer (six loops on the side instead of three):


The black mark on the orange rug was the middle marker on the rope.

All in all, if you're just starting to make rope rugs, be patient. If you do the same pattern more than once, it gets easier and faster every time.

Over time, I've even learned to wear gloves to prevent rope burn as I pull the rope through the weavings, and to sit on the already woven parts of the mat to prevent them from being tugged out of shape as I work. You'll probably discover your own tips, and having your silent partner be always at the foot of your bed after so many adventures is well worth the effort!
Sunday, June 22, 2008

Vasquez Creek Canyon

June 21, 2008
Fun Summer Day Canyoneering Adventure

Trip Stats:
Roundtrip Distance: About 5 miles
Start/End: Vogel Flat Road (East Picnic Area) off Big Tujunga Rd
Gain/Loss: 900ft / 275m
Time: 7 hours (for us)
Difficulties: 5 rappels, some downclimbing and awkward tree 'scrumbling',
Other Information: Chris Brennen's Writeup

Overview:
Though Chris Brennan gives this canyon only two stars, this canyon shines in the summer when its shade and water are welcoming on the hottest days. It isn't as 'clean' as some of the super-classics like Rubio or LSA (i.e. there are lots of downed trees, etc), but with the interesting basic problem solving, overhanging sides with beautiful dripping hanging fern gardens, and clear water (this canyon does not seem to be a pond scum farm due to its shady nature), Vasquez canyon has a charm all its own.

Canyon Description:

After some missed turns in the car we found the parking lot and packed up. For reference, Big Tujunga Road is located off the 210 Freeway by taking the Sunland Ave exit in Sunland, heading East on Foothill Blvd (Foothill = the other name for Sunland Ave) until Oro Vista Ave, and then taking Oro Vista North until it turns into Big Tujunga.

The trails in Chris's description were in good shape, though in the past they sometimes haven't been, due to overgrowth and flood. This time, we were lucky to follow the trail all the way up the Big Tujunga, up the ridge, and to the fir grove just West of the canyon drop-in. To my surprise, the Big Tujunga was dry, dry, dry! Also, the heat was quite oppressive in the morning on the ridge hike up, despite the intermittent shade and our relatively early start.

But once in the canyon (someone has placed a large cairn near the drop-in entrance), shade and a small trickle of water greeted us....relief.

  • At the first drop (~10ft) we downclimbed the hollow downed tree that has been stationed there for many years - very neat in higher water when the flow goes through the tree itself!
  • At the awkward second drop (~10ft) we set up a handline on the very large fallen and forked oak log that has been more recently placed there.
  • After a bit more scrambling, we came to the first rappel (~30 ft). I've not solved this rappel the same way twice - sometimes having a wedged log to tie off, sometimes scrambling up a loose and exposed slope to canyon right to a tree, but this time we found neither log nor safe access to said tree. Thus, we made a rockpile in the streambed, tied off the back rock, and used that. Probably the most interesting problem of the day.
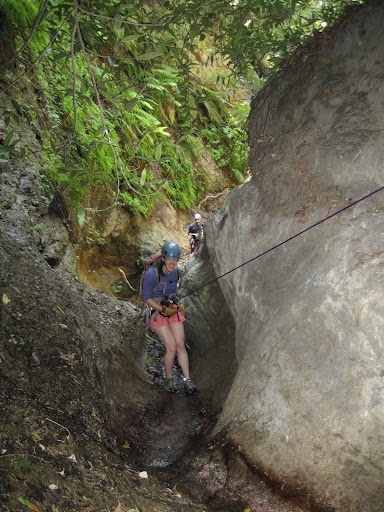
  • Immediately after, we came to the second rappel, off of a dead but still well-rooted tree on canyon right. This rappel was shorter (~12 ft) and easier to set up, a relief after the rock pile. Here is Keith on the rappel:


  • Some more boulder hopping and under-tree ducking brought us to the third rappel (~30 ft) which was anchored off of tree roots to the right (very cool). Here is Kristie heading down:

  • The canyon then relents in this steepness for a little while but various short downclimbs under and over large trees continued
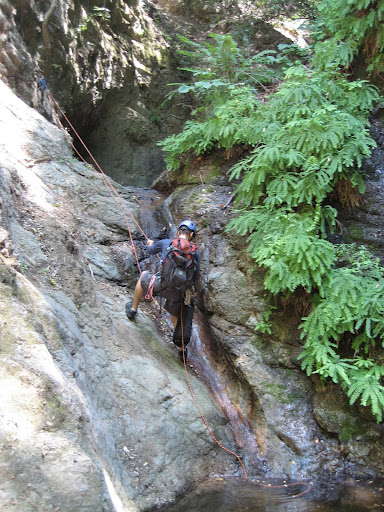
  • Finally, the double rappel at the end of the canyon appeared. The first of the two rappels goes down about 15 ft, into a short, water filled pool, and then down another seven or so feet to the top of the last rappel. The last rappel (~70 ft) anchors off a tree on canyon left. Here is a view from the top of the last rappel:


This canyon changes a lot over time. With the exception of the last two rappels, I remember all the other rappels each being variously downclimbable due to treefall piles in the right places, but at other times (like this one) all are rappels.

In addition, the first rappel anchor changes with the fickleness of the latest flood. Huge logs, rockfall, and other features change position much more than I've seen in other canyons. Odd, as this canyon is not scraped clean from obvious flashing.

Overall, a great day. In addition to those above, you can view all six photos from the trip. Thanks to Kristie and Keith, this was my first canyon I did with them, and it was fun.

Tuesday, June 17, 2008

Unpacking the Rae Lakes Gear Plan

20-20 Hindsight With Comments

The original reason I posted my planned gear list for my Rae Lakes trip was so that I could review the gear setup (rather than just individual items) upon my return. So, here I am.

For each bit of my copied-over gear list below, I'll use one of three probably-self-explanatory comments, along with some plain old-fashioned English description:

  • Yay - worked great, would have been much less happy without that specific piece
  • OK - did its job, could probably have gone with anything of similar function
  • Boo - wouldn't have brought it, or would have brought a different item of similar function
Here's the same list in order of descending weight. Again, you'll note that a lot of it isn't really backpacking gear...it's more like climbing gear that I'm bringing backpacking. So you can keep that bias in mind with my comments.

Gear List:

___ Cilogear 60L Pack (68 oz) - Yay! Incredibly enough, despite the thin straps and climbing-oriented build, this pack kept me relatively comfortable. And I loved the clip-off lid for taking into my tent at night.

___ Black Diamond HiLight Tent (50 oz) - Yay! The weight of a bivy, for the palatial space of a two-person tent. However, the inside-setup poles and the big front door conspire together to let precipitation in (yes, inside) the tent while setting up in a storm. Not much, but some.

___ REI Kilo Plus Sleeping Bag and Outdoor Research Dry Stuff Sack (48 oz) - OK... I missed my stretchy sleeping bags (Montbell) for comfort (and less weight) on the longer trip

___ Garcia Machine Bear Canister (44 oz) - Yay! I can't believe I'm saying yay to a bear canister. I hate bringing these things. But it gave me the flexibility to camp where ever I liked, including away from the bear boxes, and some bear boxes were broken in early season. Plus, doing a food hang solo isn't much fun.

___ Emergency Kit (first aid kit, repair, survival) (22 oz) - Yay! The gauze actually got used to cover my poison oak on my elbow the whole trip. Thank goodness I packed cloth gauze - I needed to boil the old dressings to re-apply them.

___ MSR Reactor and lexan spoon (21 oz) - Yay! This thing is so fast....and so efficient. Two liters boiled every morning, and two every night, and less than one 8oz canister of fuel.

___ Added my Stubai Aluminum Crampons (21 oz) - Yay! They add stiffness to hiking boots enough to pretend to kick on snow, they're pretty light, they adjust quickly, and they fit well. And on softer snow like I had, they work great. Bulletproof ice would be a very different story.

___ Wild Things EP Jacket (18 oz) - Yay! Fits over all my layers including my thin down jacket, warm, windproof, very rain-resistant...and it's orange. What else could I want?

___ Insul-Mat (Pacific Outdoor) SL Mountain foam pad (14 oz) - OK... It would have been a YAY should I have needed to camp on the snow (I know from previous experience) but the soft foam wasn't stellar when I was pushing through early-season downed pine trees. By the end of the trip it had taken a beating.

___ Isis Whisper Down Jacket (14 oz) - OK.... Nice to have a thin down jacket for more warmth (I used it two nights) but the sleeves on this are a leeetle short...

___ Bear MACE and holster (13 oz) - ???... Didn't use, but there are some WEIRD PCT-ers that I saw who made some awfully pointed comments about me being a woman all alone out there... I was glad I had it.

___ Golite Gamut Jacket (13 oz) - Didn't use, but on previous trips it's been great.

___ Red Ledge Full Zip Rain Pants (10 oz) - Again, didn't use, but on previous trips they've been nice.

___ Moonstone Cirrus Vest (9 oz) - At the last minute, I left this in the car. Glad I did.

___ Patagonia Capilene 4 Hoodie (8 oz) - OK.... I love this hoodie for climbing, and it's super light, but the forearms...are...so...tight!! And sleeping in it at night makes the grid fabric press into my skin and my arms itch! Really Patagonia, you don't think women have burly forearms? Sheesh.

___ SPOT Messenger (8 oz) - Yay! My husband tracked me the whole time. Fun! Although it was interestingly weird being able to send my precise position to my husband, but not necessarily know it myself...

___ Camera and dry case (8 oz) - Yay! The proof is in the pudding, as they say.

___ Nalgene bottle (also for hot drinks) (7 oz) - OK, I might have brought a light mug and another Platypus bladder.

___ Princeton Tec EOS (4 oz) - Ended up bringing my 10 oz Black Diamond Soliras since it's brighter and I had just nearly epic-ed the Thursday before leaving with my EOS. For truly needing a headlamp for off-trail routefinding at night, the EOS is pretty weak.

___ Journal and Pencil (4 oz) - Yay! I wrote a lot, it saved me mentally.

___ Warm Hat (3 oz) - Yay!
___ Sunscreen (3 oz) - Yay!
___ Bug Repellent (3 oz) - Yay!

___ Platypus 1L flexible bottle (2 oz) - Yay! These things are so great and lightweight...but, they don't take boiling water, which was one of my main methods of purification.

___ Liner Gloves (2 oz) - Yay! Very necessary for going up Glen Pass

___ Custom Mytopo.com Map (2 oz) - Yay! One map, the entire trail. I carried it in my pocket the whole time, so we know the paper is sweatproof, at least.

Carried on Person: Pants, T-shirt, Sunhat, Sunglasses, Compass, Knife, Whistle, Socks, Boots, Trekking Poles with Whippet - All Yay!

Food and Fuel:

1.5 lbs per day x 6 days = 9 lbs (144 oz) - See Comments Below, 2200 calories per day was a good amount to plan around.

Two 4 oz isobutane canisters (8 oz) - Didn't need the second one because of the MSR Reactor's efficiency

Food in Detail:


___ 200 cal Breakfast:
Cream of Wheat - Yay! The best alternative to oatmeal, which I detest.
Hot Chocolate - Yay! And then there was the brilliant day that I added the hot chocolate to the Cream of Wheat....
Instant Miso Soup - Never used. With the Mountain House dinners, I definitely did not have a lack of salt intake.

___ 100 cal drink mix - Yay! I would have brought more for the more strenuous days.

___ 200 cal dried fruit - Yay! How else would I have gotten fiber without the ProBars below?

___ 400 cal Probar (mmmm....fiber) - Never used. Nearly a Boo. Good as meal replacements in my past experience, but not for meal augmentation. Too dense.

___ 300 cal 2 x Other Bars
Trader Joes Bars - OK, they do their job
Luna Bars - Chocolate Peppermint Stick is the most genius flavor out there, though I suppose that's a matter of opinion...

___ 200 cal Clif Shot Bloks - Yay! Nothing like gummies for adults.

___ 300 cal Cheese - Yay!
___ 200 cal Nuts - Yay!
___ 100 cal Jerkey - Yay!

___ 400 cal Dinner:
Mountain House - OK to Boo - For the meals that had less than 50% of my daily sodium in them, they were okay. Sometimes good actually. But, for example, Beef Stew which had more than 100% of my daily sodium in only about 400 calories, I was close to gagging. I can't take that much salt!
Instant Mashed potatoes - Yay! Add some cheese left over from earlier in the day, perfect.

And there you have it. It was a fun five days, and all the tools I brought helped me make it. Have fun planning your own!

Sunday, June 8, 2008

Rae Lakes Loop

June 3-7, 2008
Beautiful, Snowy, Solo Backpacking

Trip Stats:
Distance: About 50 miles (with side trip to Charlotte Lake), 47 without
Start/End: Roads End in Kings Canyon National Park
Gain/Loss: About 7,000 ft / 2100 m
Time: 5 days, 4 nights
Difficulties: Snow and light mountaineering on Glen Pass (in June, otherwise all trail); five days with me, myself, and I; not wanting to depart such a beautiful place

Overview:
The Rae Lakes Loop is a spectacular hike. Especially in June, which keeps away the crowds because of the snow, the difficulties of crossing Glen Pass, and the impassibility of Kearsarge Pass (the short way in from Onion Valley), it is quite amazing to have the place all to oneself.

Notes:

Otherwise, enjoy!

Day One (June 3): Road's End to Lower Paradise

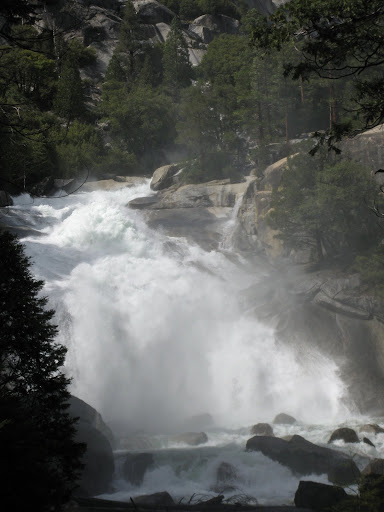
No one was at the Ranger Station, so I self issued a permit and started off. I drove in that morning, and started hiking at around 1pm. The South Fork of the Kings River roared down the valley, creating the beautiful Mist Falls:


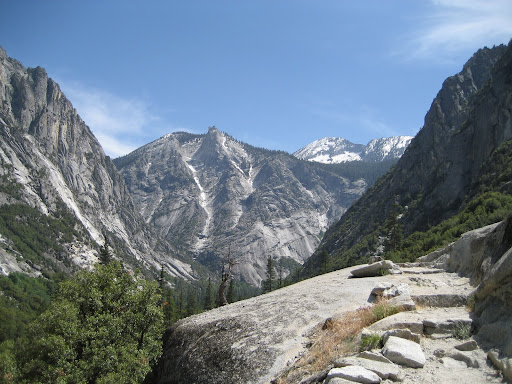
Looking back downcanyon toward the Sphinx, I could tell I was in a beautiful place:


Day Two (June 4): Lower Paradise to Wood's Creek Crossing

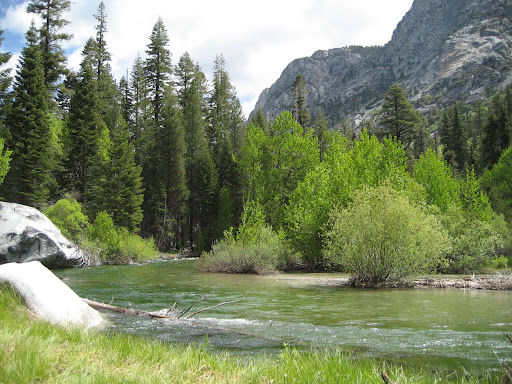
After the constant uphill of Day 1, it was nice to walk along flatter terrain for a while in the morning. After crossing the bridge over Arrow Creek and turning onto the northern leg of the loop, green and meadows greeted me everywhere:


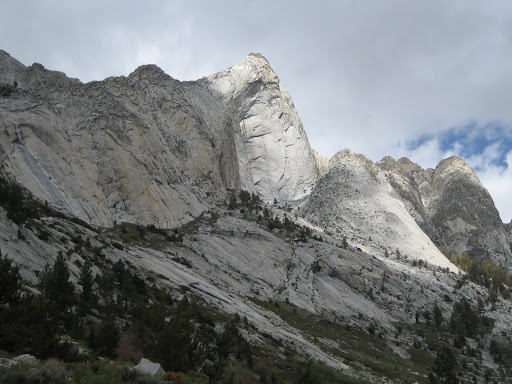
Thankfully, mosquitos were still at a minimum due to the early season. Near the Wood's Creek crossing over the suspension bridge, I was awed by the amazing undercut roof of the main Castle Dome:


In the evening, I reached the campsites after the suspension bridge and camped there for the night.

Day Three (June 5): Rae Lakes, Glen Pass, Charlotte Lake

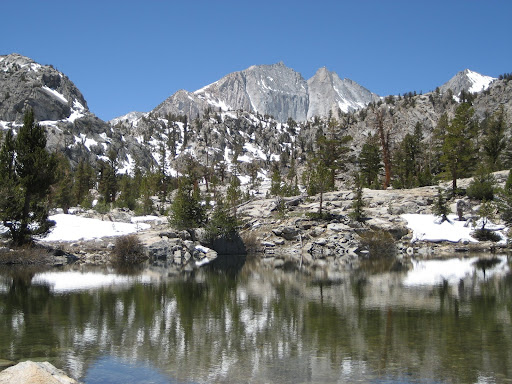
As I climbed steadily up toward Rae Lakes, the true beauty of the alpine area began to show:


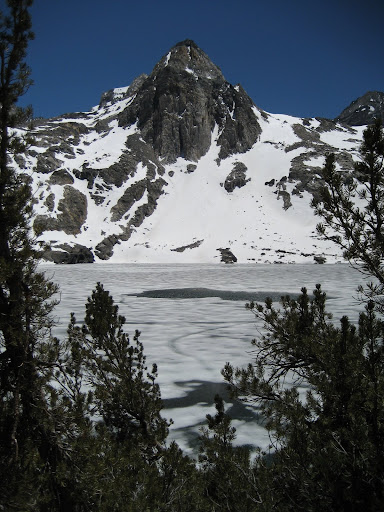
There was still a lot of snow up there. The Painted Lady (rock formation to climber's left of the North side of Glen Pass) stood guard above a frozen upper Rae Lake:


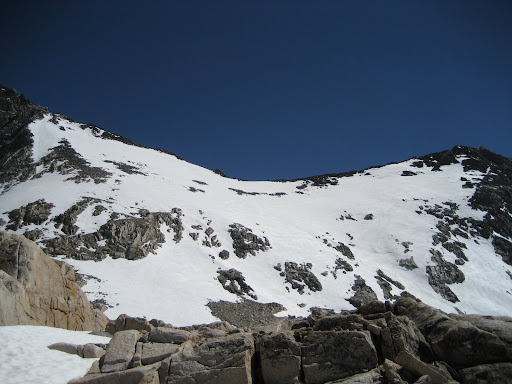
The pass itself was quite snowy, and didn't seem so bad from the bottom. However, as the upper final 700' became visible, it was obvious that it would be exposed and somewhat difficult (it ended up being 2nd class on snowy rock, with ice and snow travel of course).

The best path proceeds up the left rock ridge (hidden behind the boulder) and then up across the top of the cliff bands and diagonal through the upper rock band to the low point on the horizon:


It was definitely more exposed and therefore hazardous than I expected. I appreciated my crampons and whippet pole. However, I mostly depended on good footwork because self arrest would have been quite difficult in the short and steep space above the rocks.

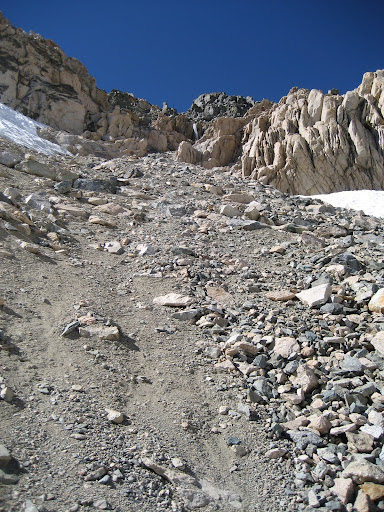
The south side of Glen pass was relatively snow free (unlike the rest of the trails on the south side) but the snow was covering the important part (the trail) and so some scree skiing and scrambling was in order:


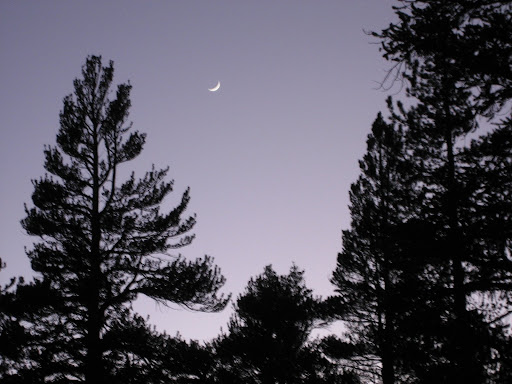
I had intended to camp at Rae Lakes, but because the snow was good I decided to cross the pass (if the snow is good - you go!) and then traveled cross-country to Charlotte Lake to camp. This put me one day ahead of schedule. Here is the moon above trees at Charlotte:


Day 4 (June 6): Charlotte Lake to Charlotte Creek

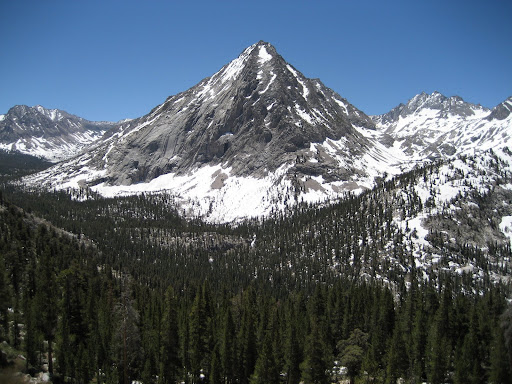
There was a great deal of snow (and thus and trail-less routefinding) from Charlotte to Vidette meadows. However, I was compensated with gorgeous views of East Vidette and the Bubb's Creek valley:


After passing Bullfrog Lake, Vidette Meadow, and Junction Meadow, I stopped at Charlotte creek (the second-to-last campsite before Road's End) for the night.

Day 5 (June 7): Charlotte Creek to Road's End

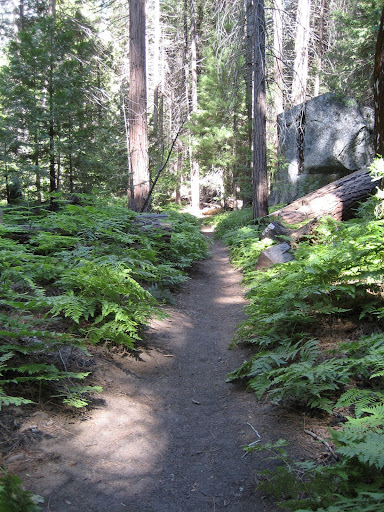
I arose early and headed down the trail. It was good to walk the last bit of trail and complete the loop, but it is such a great hike I was sorry to go:


I closed the trip with a poem I wrote for Roy while on the loop. Enjoy:

In this Wildness
I put dried figs in my pocket
Sing
And depart
For civilization
Makes wind and roaring water
Echoes across the canyon
In my mind
I must remember the silence
Of knowing no force but time